Among Adobe Illustrator’s growing collection of AI-enhanced features, Mockup stands apart for one important reason: it works entirely offline. Unlike many of Adobe’s newer tools, it doesn’t depend on Firefly, yet it remains one of the most practical and impressive technological additions to Illustrator—and, for many professionals, one of the few AI-assisted features that genuinely earns a place in everyday workflows.
The tool allows designers to place a flat 2D graphic onto a three-dimensional object, such as a mug, package, box, or other product surface, creating realistic visualizations without the need for complex 3D software. By intelligently adapting artwork to curves, edges, and contours, Mockup provides a quick way to see how a design might appear in the real world.
Previously, creating convincing product mockups often meant building detailed 3D scenes in software like Blender. Illustrator’s Mockup feature streamlines that process dramatically, producing comparable presentation results in a fraction of the time.
Below is a simple walkthrough for getting started with the tool.
How to use Illustrator’s Mockup tool
01. Choose your source image
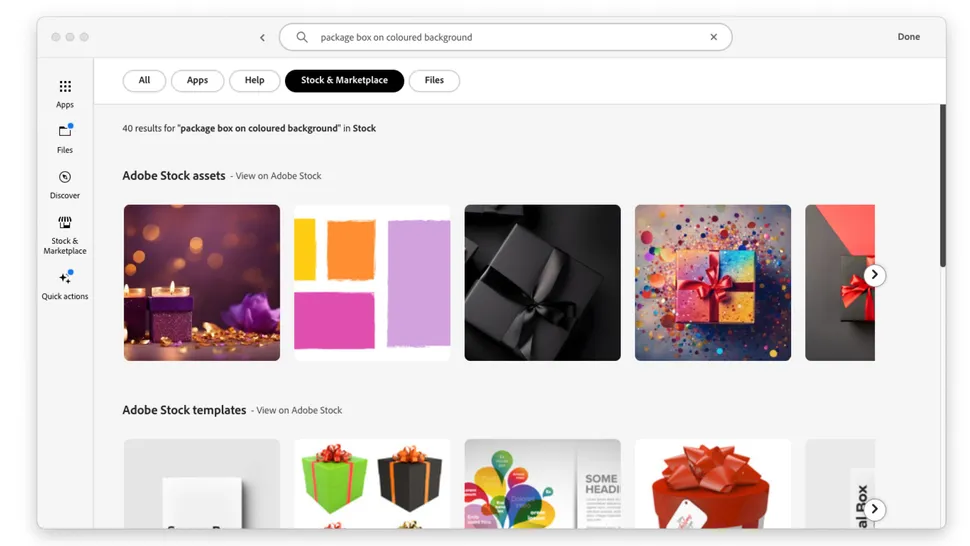
Start by selecting the image that will serve as the foundation for your mockup.
You can import visuals from several sources, including Adobe Stock, online image libraries, or your own photographs. Once you’ve chosen an image, drag it onto the Illustrator canvas along with the graphic or design you want to showcase.
Having both assets ready on the artboard ensures a smooth setup for the next step.
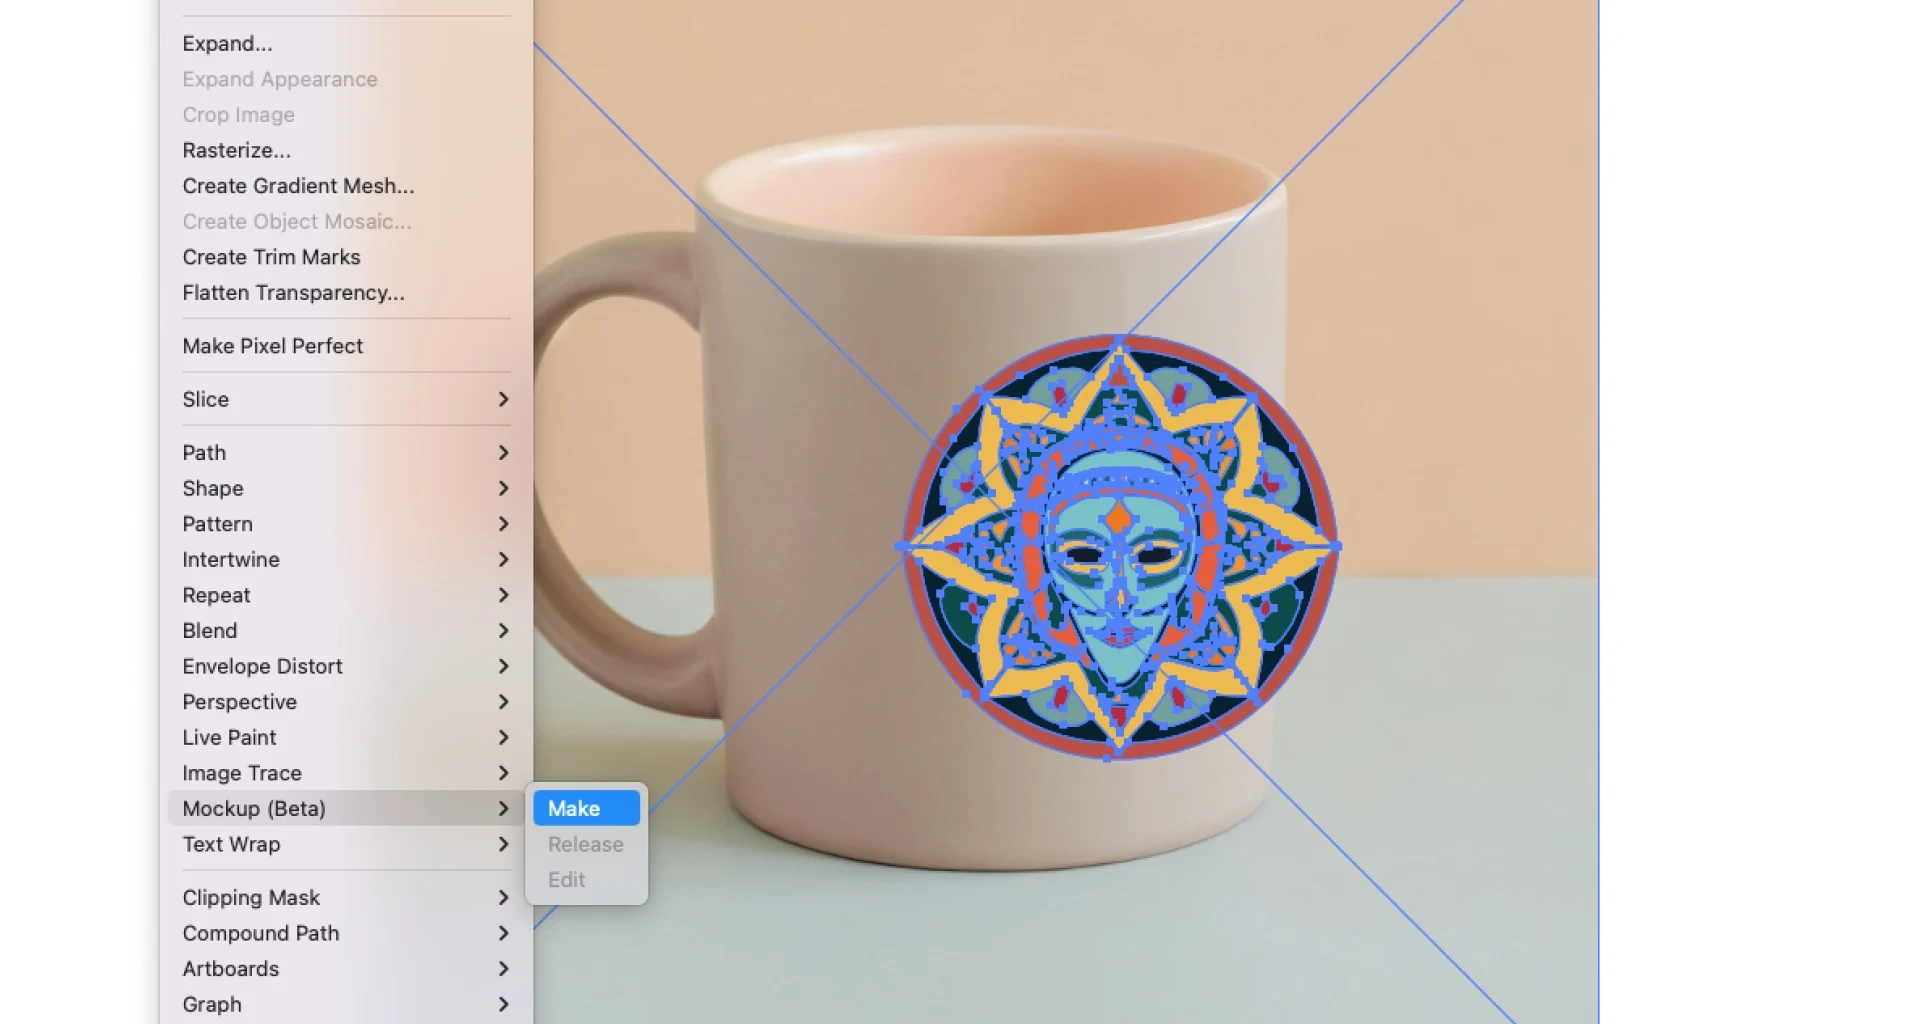
02. Create the mockup
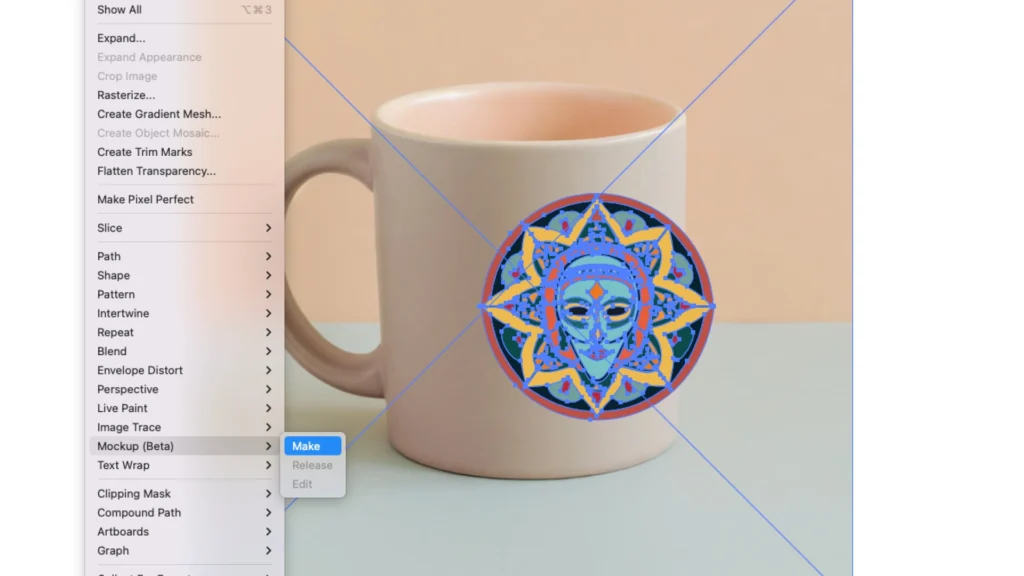
Select both the product image and the artwork you want to apply.
Then navigate to Object > Mockup > Make.
Illustrator will automatically analyze the selected image and intelligently project your design onto the object’s surface. The tool takes factors such as curvature, perspective, and contours into account, helping the artwork appear naturally integrated into the scene rather than simply pasted on top.
Within moments, your flat design is transformed into a realistic product visualization.
03. Fine-tune the placement
After the mockup has been generated, adjust the position of your artwork until it sits exactly where you want it on the object.
You can move and refine the graphic to achieve the most convincing composition. For additional realism, consider changing the artwork’s blending mode to Multiply. This allows underlying colors, shadows, and surface details to subtly influence the design, helping it blend more naturally with the object beneath.
With a few simple adjustments, you can create polished presentation visuals that would traditionally require far more time and technical effort.