Layer masking is one of the most powerful and essential tools in Photoshop, especially for anyone serious about photo editing, retouching, or compositing. Unlike erasing or deleting parts of an image, layer masks let you hide or reveal parts of a layer non-destructively—meaning you can go back and change things anytime. If you’re new to masking, this guide will walk you through everything you need to know to get started.
What Is a Layer Mask?
A layer mask is a special type of layer in Photoshop that allows you to control the visibility of parts of the layer it’s attached to. Think of it as a “hidden window” through which you can see the content behind a layer.
- White on a mask reveals the layer (visible)
- Black on a mask hides the layer (transparent)
- Gray on a mask creates partial transparency (semi-visible)
The beauty of masks is that they don’t delete anything—they just hide it. This makes your edits flexible, reversible, and professional.
How to Add a Layer Mask
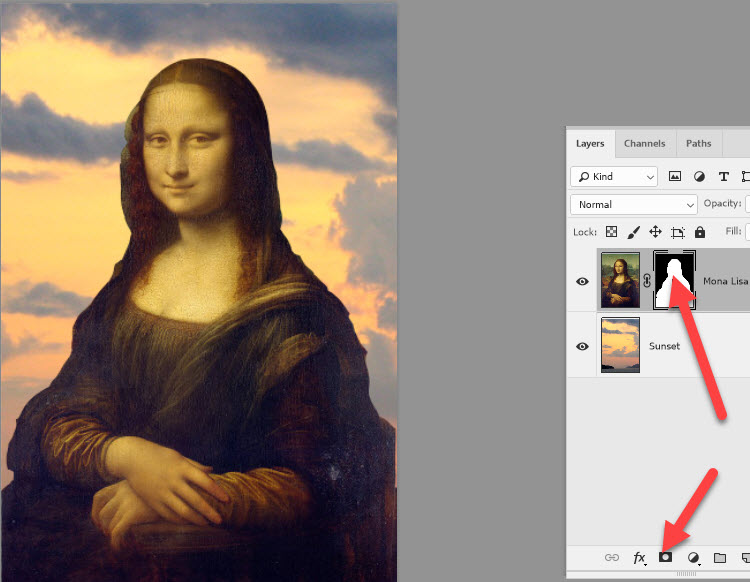
- Select the layer you want to mask.
- Click the Add Layer Mask icon at the bottom of the Layers panel (it looks like a rectangle with a circle in the middle).
- A white thumbnail will appear next to your layer thumbnail—that’s your mask!
Now you’re ready to start painting on the mask to show or hide parts of the layer.
Basic Masking Workflow
Here’s a simple process to use a layer mask:
- Select the mask thumbnail (click on it—there will be a white border around it).
- Choose the Brush Tool (B).
- Set your foreground color to black to hide parts of the layer.
- Paint on the canvas—wherever you paint black, the image will disappear.
- Switch the brush color to white to bring areas back.
Tip: Use a soft brush (lower hardness) for smooth blends and a hard brush for sharp edges.
Quick Masking Use Cases
Here are a few common beginner-friendly ways to use layer masks:
1. Blending Two Images
- Place two images on separate layers.
- Add a mask to the top image.
- Use a black-to-white gradient on the mask to gradually blend the two together.
2. Removing a Background
- Use the Quick Selection Tool or Select Subject to isolate your object.
- Add a mask while the selection is active—Photoshop will create a mask hiding the background.
- Refine the edges using a soft brush or the Select and Mask workspace.
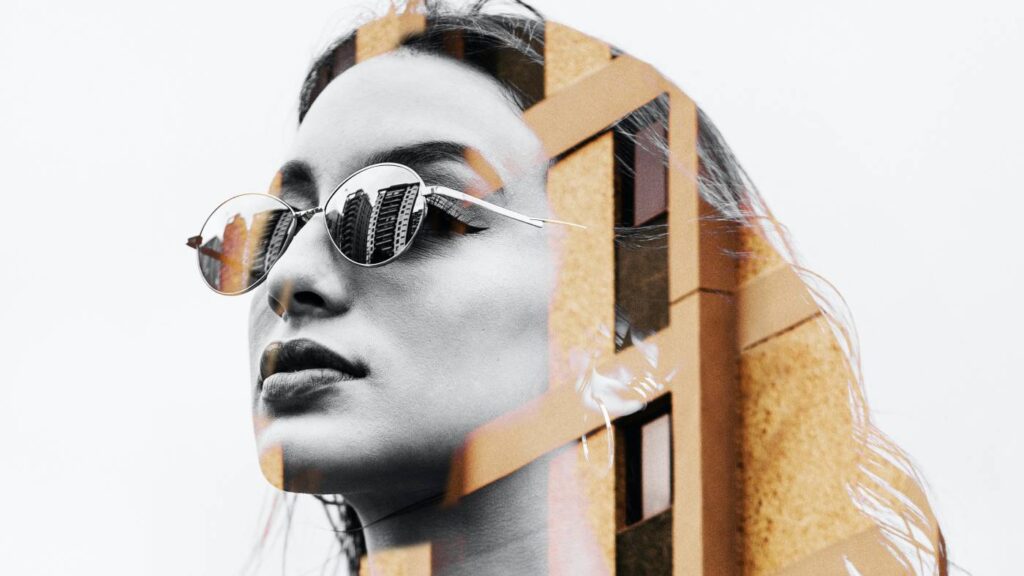
3. Creating Double Exposures
- Place a silhouette photo on top of a scenic image.
- Use a mask to paint in parts of the bottom image inside the silhouette for a creative blend.
Tips for Better Masking
- Use black, white, and gray: Think in terms of visibility. Paint with varying levels of gray to create soft transitions.
- Alt/Option + Click on the mask: This lets you view the mask directly in black and white.
- Shift + Click on the mask: Temporarily disables the mask so you can compare before and after.
- Ctrl/Cmd + Click the mask: Loads the mask as a selection.
Refining Your Mask
If your edges look rough or unnatural, Photoshop gives you tools to polish them:
- Right-click the mask and choose Select and Mask
- Use tools like Refine Edge Brush and Feather to soften harsh lines
- Adjust Contrast and Shift Edge to tighten or loosen selections
Layer Mask vs. Vector Mask vs. Clipping Mask

- Layer Mask: Pixel-based mask you paint on (most common)
- Vector Mask: Uses paths and shapes, good for sharp-edged graphics
- Clipping Mask: Uses the content of the layer below to define visibility (great for text or logos)
They serve similar functions but are used in different contexts. For beginners, start with layer masks and explore others as you advance.
Final Thoughts
Layer masks are a foundational skill in Photoshop that unlock a world of precise, flexible editing. Whether you’re blending photos, cutting out objects, or adding subtle effects, masks let you control what’s seen and what’s hidden—without damaging your original image.
Once you get the hang of painting with black and white to control visibility, you’ll wonder how you ever edited without them. It’s not just a tool—it’s a design superpower.