Adobe Illustrator’s Text-to-Vector feature opens the door to creating detailed vector artwork using nothing more than written descriptions. With a simple prompt, even someone with little design experience can generate complex illustrations in minutes, while professionals can use the tool to brainstorm concepts, visualize ideas quickly, or create rough client mockups before moving on to final artwork.
Although most experienced designers are unlikely to rely on AI-generated results as finished pieces, the tool excels as an ideation engine. It lowers the barrier to entry for beginners, speeds up creative exploration, and provides fully editable vector graphics that can be refined after generation.
If you’re curious about incorporating AI-assisted design into your workflow, here’s a detailed guide to getting started with Illustrator’s Text-to-Vector tool.
How to use Illustrator’s Text-to-Vector tool
01. Open the Text-to-Vector workspace
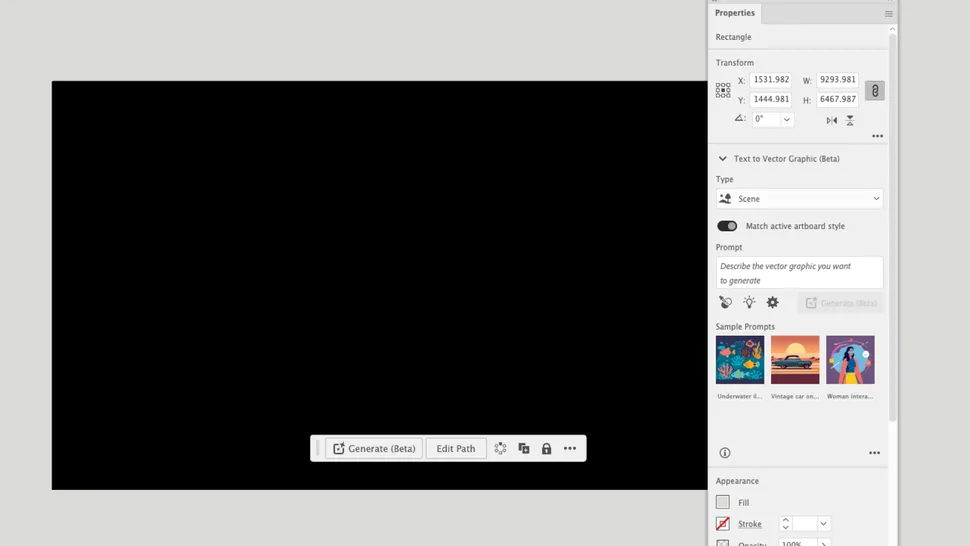
Since Text-to-Vector Graphic remains in beta, it isn’t immediately visible within every part of Illustrator’s interface.
To access it, open the Properties panel and select Window > Text to Vector Graphic. Alternatively, enable the Contextual Bar by navigating to Window > Contextual Bar. Once activated, the Contextual Bar stays available and appears beneath selected objects or frames.
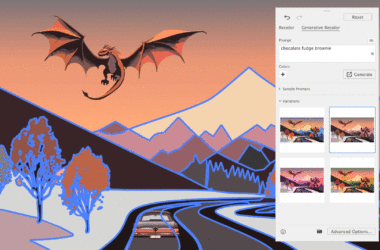
To begin, draw a frame on your artboard. Because the final output is vector-based and fully scalable, the exact dimensions are not critical. However, it’s helpful to consider the intended format from the start. For example, you might create a square frame for social media graphics or a 16:9 layout for video-related content.
02. Choose the type of graphic you want to create

If you’re working through the Contextual Bar, click Generate (Beta) to reveal the creation options. Users accessing the tool through the Properties panel can skip this step.
Next, select the category that best fits your project:
- Scene
- Subject
- Icon
- Pattern
For broader illustrations, starting with Scene is often the most effective approach, as it establishes an environment, perspective, and visual context that can guide future additions.
03. Write your text prompt
Now it’s time to describe what you want Illustrator to create.
Generally, the more relevant detail you provide, the better the results tend to be. Consider including information about:
- Environment or setting
- Artistic style
- Time of day
- Colors
- Composition
- Important visual details
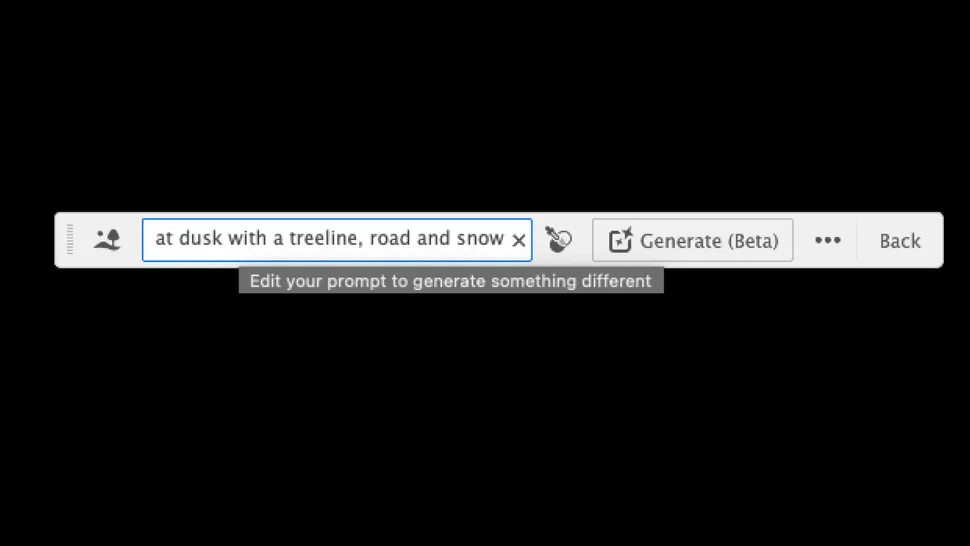
For example:
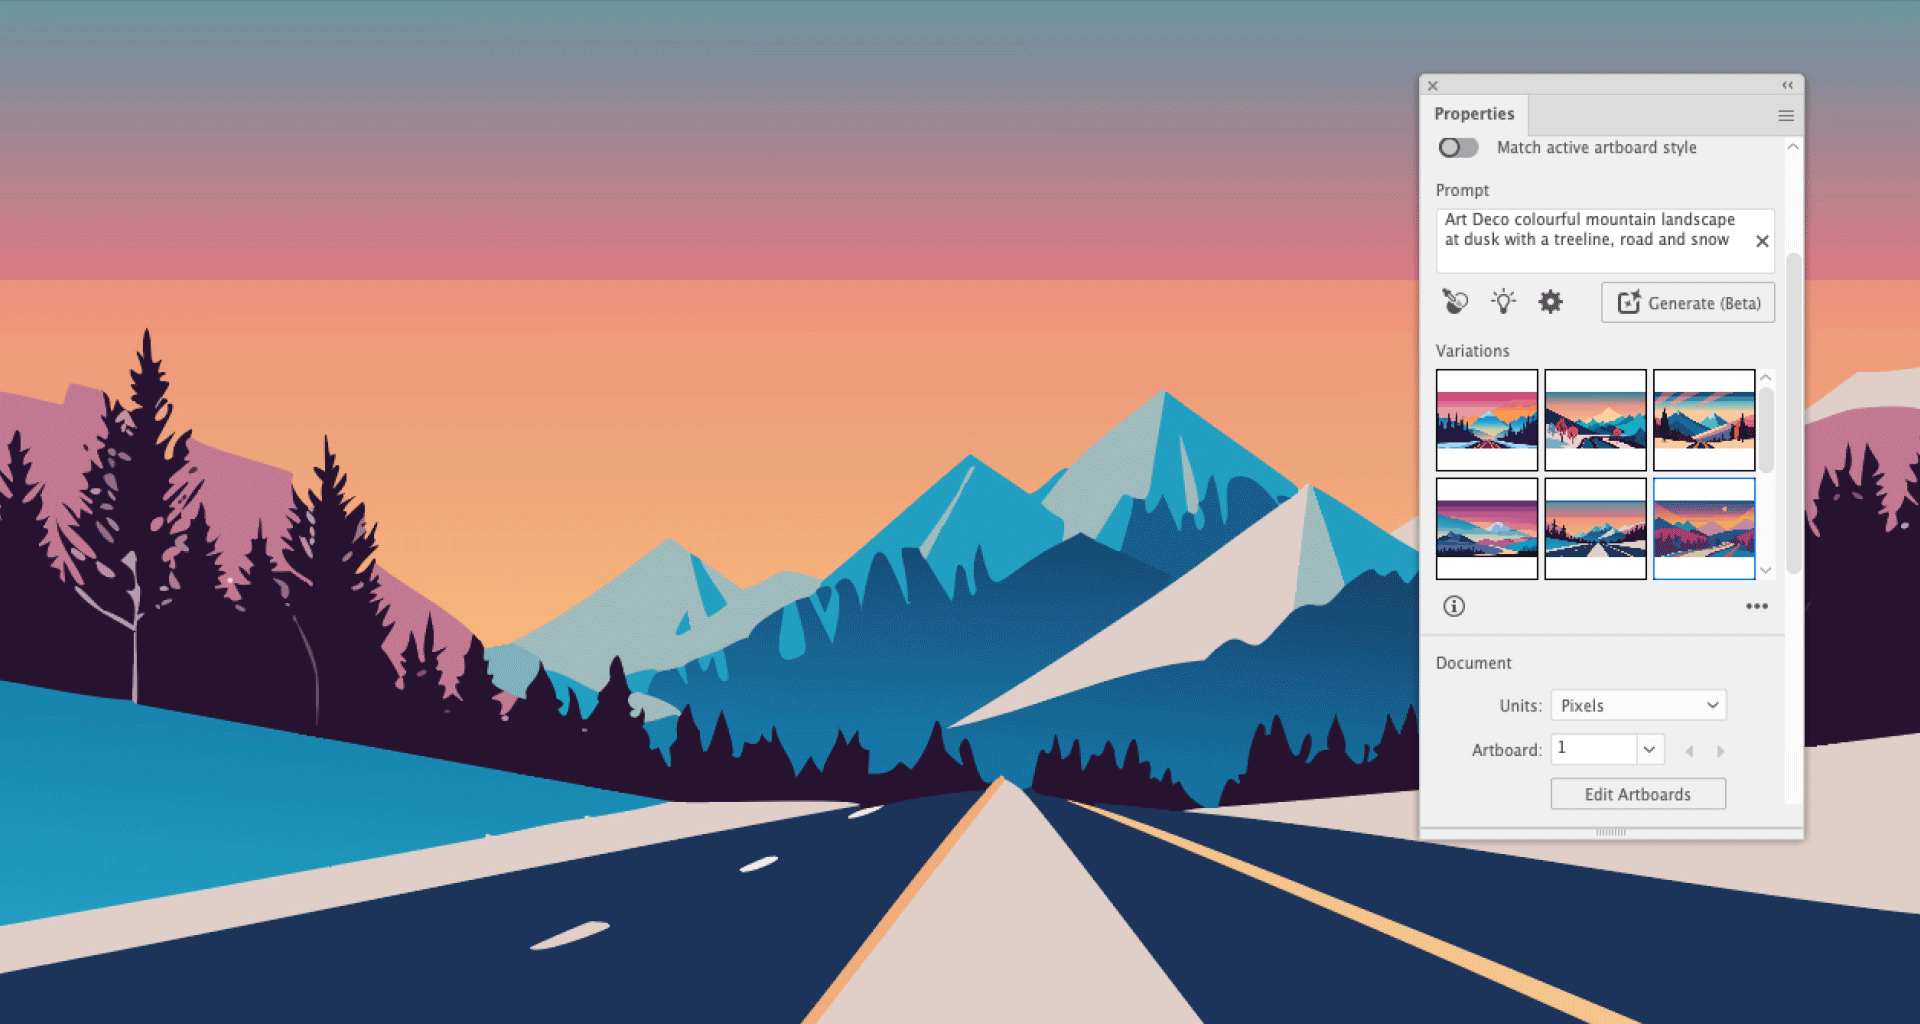
“Colorful Art Deco mountain landscape at dusk with snowy peaks, a winding road, and a dense treeline.”
If you’d like the generated artwork to mimic the visual style of an existing design, you can place a reference image onto the canvas and use the Style Picker tool to guide the AI.
The Properties panel also offers sample prompts and includes a detail-level slider, which is set to 3 out of 5 by default. Adjusting this setting allows you to control the complexity of the generated artwork.
04. Evaluate and refine the results

Each time you click Generate, Illustrator produces three unique variations based on your prompt.
You can browse through the results using the navigation arrows in the Contextual Bar or preview them via thumbnails in the Properties panel.
As with most AI-powered tools, results can vary significantly. Some generations may look polished and convincing, while others may contain awkward compositions, unusual details, or visual inconsistencies that reveal the absence of human judgment.
Adobe encourages users to rate generated results, helping improve the system over time through feedback.
If none of the initial options meet your expectations, you have two choices:
- Generate three entirely new versions.
- Refine your prompt to provide clearer guidance.
Keep in mind that each generation consumes credits from your Adobe account. However, even after reaching your allocation limits, you’ll still be able to access AI features—processing may simply become slower.
05. Expand and build your illustration

Once you have a solid foundation, you can continue developing the artwork by generating additional objects, characters, or visual elements.
Illustrator automatically attempts to match newly generated content to the style of the existing artboard, helping maintain visual consistency across the project. This setting can be disabled through the Properties panel if desired.
Building a complete scene often requires experimentation. Finding objects that align naturally with the established perspective, composition, and style can involve multiple rounds of testing and adjustment.
Patience is key. AI-generated design remains a collaborative process rather than a one-click solution, and flexibility often leads to stronger results.
06. Refine and clean up the final artwork

If your goal is simply to create a rough concept or storyboard, the generated artwork may already be sufficient.
For more polished applications, however, manual refinement is usually necessary.
Although the vectors are editable, generated assets can sometimes contain:
- Unwanted shadows
- Irregular shapes
- Extra anchor points
- Inconsistent line work
- Minor visual artifacts
This stage is where traditional design skills come back into play. Carefully review each element, remove unnecessary details, smooth imperfect paths, and replace any shapes that don’t meet your standards.
Think of AI generation as the starting sketch rather than the finished masterpiece. The strongest results often emerge when Illustrator’s automation is paired with thoughtful human refinement.
Used this way, Text-to-Vector becomes less of a shortcut and more of a creative accelerator—helping designers move from idea to visual concept in minutes while still preserving artistic control over the final outcome.